Showing posts with label baking. Show all posts

Tuesday, February 23, 2016

Chocolate Dipped Pretzels


Here's what you'll need:
Pretzel Rods
1 Bag of Semi Sweet Chocolate
1 Bag of Green Candy Melts
1 bottle of Sprinkles
2 Mixing bowls
2 Spoons
Wax paper
Microwave
 
First take your green candy melts and cover the bottom of a bowl. If you do not have a mixing bowl you can use a tall coffee mug (which I actually think works better).
Do the same think with your milk chocolate in your bowl or mug.
 
 
I put my chocolate in the microwave for 30 seconds and check it to see it's progress. Then I place it in the microwave for another 30 seconds. Times will vary depending on your microwave. Start out using too little time until you know how fast your microwave is going to melt the chocolate. The last thing you want in your house is the smell of burnt chocolate.
 
Once you take out the chocolate, mix and smooth it out with a spoon.

Take a pretzel rod and dip it into the chocolate of your choice. I find that rolling the pretzel rods along the side of the mug or bowl helps to evenly distribute the chocolate onto the rod and keeps it from getting too thick.

Once you have your chocolate onto the pretzel you can either leave them plain or add fun sprinkles. You'll need to decide quickly if you want to add them because the fresher the chocolate is on the pretzel the better the sprinkles stick to it.

For my pretzels, I added the only sprinkles I have in the house at the moment which is Easter ones. Earlier in the month I had Valentines Day Sprinkles all over them. If you decide to add sprinkles have a bowl underneath the rod to catch any sprinkles that don't make it on to the rod. That way you can reuse them and drop onto the next ones.

Once you have your sprinkles on, place the rods on your wax paper to let them harden. Give them a good hour before you bag or place in a container. You want to make sure the chocolate is hard and not sticking to the wax paper when you put them away.


You can make these chocolate dipped pretzel rods for any occasion. If you use the green candy melts you can have yourself an Easter or St. Patrick's Day dessert. I did two of mine in green but then realized I had no St. Patrick's Day sprinkles so I stuck with my milk chocolate.
 

These were my Valentine's Day ones...
 
They only take about 30 minutes to make depending on how many you want to create. Remember a typical bag of pretzel rods has 33-35 inside but there will be broken ones. Plus if you are like me... you snack along the way while making them. So enjoy these fun and easy treats for your next holiday party!

Tuesday, February 9, 2016

The Best Chocolate Pie


Last week my Peanut Butter Pie was a hit! I wondered how I could follow it up. So I thought what kind of pie could I make? The answer was simple... Chocolate! Who doesn't love chocolate? Your friends will go crazy over it!

What you'll need:
1 Cup of Chocolate Chips
1/2 Cup of Sugar
1 tub of Cool Whip
1/3 Cup of Milk
1 Teaspoon of Vanilla extract
1/3 Cup of Cocoa Powder
Mixing bowl
Measuring cups
Measuring spoons
Oreo Pie Crust
Electric mixer
 
The first thing you'll need to do is get your cream cheese, sugar, cocoa powder, milk and vanilla extract into your mixing bowl. Once you have it in your bowl slowly mix it with your electric mixer.

It will start to look something like this...

Once you have it well mixed, mix in only 1/4 cup of your chocolate chips.

It will look a little lumpy once you add the chocolate chips but your chocolate mixture should still remain smooth. Next open your pie crust and spoon the mixture into the pie crust.

I typically use the Oreo crust but the store was out this week. Instead this time I used a chocolate crust.

Once you've got your pie mixture evenly smoothed into the crust, you'll want to open your cool whip container. Make sure that your cool whip has warmed some because you'll need to spoon it out and spread it on top of the chocolate mix.

Last step... add the remaining chocolate chips to the top of the cool whip. I like to sprinkle them evenly on because once you drop them on to the cool whip you don't want to try to move them around. Now you've got yourself a pie! Place it in the refrigerator and let it chill.


For best results leave in your refrigerator 4-6 hours before serving.

Enjoy!

Wednesday, February 3, 2016

Peanut Butter Pie

This recipe is my mothers and her peanut butter pie is famous. I've been making this pie for a few years now and people love it. It's extremely easy to make and doesn't require any baking. People go nuts over it! Be warned... it's very rich!
 
Here's what you'll need:
 
Graham cracker crust
1 tub of cool whip
1 jar of peanut butter
Powdered Sugar
1 block of cream cheese
Mixing bowl
Electric Mixer

The first thing you'll need to do is get all of your ingredients into the mixing bowl. You'll use the entire tub of cool whip. Add 1 cup of peanut butter. 1 cup of powdered sugar and 3 ounces of cream cheese. It should look something like this...

Next you'll take your electric mixer and mix all of the ingredients together until it's become smooth or well blended. You'll want to make sure that the powdered sugar and peanut butter is completely blended leaving no lumps. Once you have it blended you can take a spoon and scrape the sides. The mix will be thick even after it's blended.

I use a pre-made, store bought crust. Remove the plastic lid and place the crust near your mixing bowl. You'll want to take your pie mix and pour it into the center of your crust.
 
Use your spoon and fill the crust from the center outward. Gently smooth the pie mix outward. If you push too hard or pull upward the crust will stay attached to the mix and come up from the container. Make sure to get the mix evenly around the crust and along the edging. 


Pay close attention to the pattern you make with your spoon when smoothing the mix into the crust. You can do a swirl or zig zag or a circle. It's really up to you. Just be mindful because once you've got your pie mix into the crust you'll need to chill it in the refrigerator and your design will chill in place.  

Once you've finished filling up your crust, attach the plastic lid back to the pie and place in the refrigerator. Leave your pie in there for a minimum of two hours before serving. The pie is much easier to cut and better to serve if left in the fridge for four hours. Serves 6-12 slices depending on cut size. I recommend smaller sizes because the pie is very rich.

Enjoy!

Wednesday, January 27, 2016

Smore Brownie Bars

Last month I wanted to try and make a new dessert to serve after Christmas dinner. I started searching online and everything that I was seeing took tons of prep time. I wanted something pretty simple to make but would turn out great. That's when I found the Smores Brownie Bars. They were a total hit at Christmas and I was asked to make them again. I thought I would share them this time!

Here's what you need...

Baking Pan
Marsh Mellows
Graham Crackers
1 box of Brownie Mix
Oil
Water
Two Eggs
Mixing bowl
 
Pre-heat your oven to 350 and start with the brownie mix. You'll want to empty the brownie mix in your mixing bowl. Follow the directions on the mix. Add your two eggs, water and oil. It'll look like this...

Once you've got all your ingredients from the brownie mix into your bowl start stirring them together. You'll want to mix the batter about 50 times or until it becomes well mixed and no lumps. When it's ready it will start to look like this...

Now you'll need to prepare your baking pan. You have a few different options of how to do this. You can either spray it with a baking spray (which is the method I used), grease the pan or butter it. Once you've got your pan you will pour a small layer of the brownie batter into the pan. Don't pour a lot, just enough to cover the bottom of the pan.


Once you've got the layer of brownie mix into the pan you need to cover it with graham crackers. Depending on the size of your pan the crackers will not match up in length or shape. Gently break the crackers without cracking them into pieces and line them on top of the chocolate. Make sure to cover as much of the chocolate as you can.

Once the crackers are on top of the chocolate open the bag of marsh mellows. Scatter a generous amount of the marsh mellows on top of the crackers. Try not to pile the marsh mellows on top of each other but evenly  disperse them on top of the crackers. Typically I eat half the bag while their out. Try not to do that.

Once you've got your crackers down and the marsh mellows evenly on top of them you'll take the remaining chocolate mix in your bowl and spread it across the marsh mellows. Make sure to start on one end of your pan and make your way to the other side before you let all of your batter out of the mixing bowl. You'll want to make sure to cover the entire pan. It's ok to have a few areas of marsh mellows popping out.

Check your oven and make sure you are at 350. Place in the middle rack and leave in the oven for 35 minutes. Take out the pan and place a toothpick in the center to see if  the brownie mix is done. If it's not place back into the oven for another 10 minutes. These typically take anywhere from 35-45 minutes depending on your pan and oven. Once the mix isn't gooey, place the pan on a cooling rack or trivet to cool. Allow the pan to cool and cut into squares when their luke warm. Depending on how large you cut them they make from 9-12 bars.
 
Enjoy!

These Smore bars are easy to make with little to no prep work. Once you've mixed the ingredients and place in the oven it's just a waiting game.

Tuesday, December 29, 2015

Christmas 2015


Christmas has come and gone and now the countdown begins again to the next Christmas. It's only 362 days away, that's how I'm going to look at it. Before we countdown to next year, let's take a look at what this Christmas brought us.

On December 23rd we started our Christmas shopping. Nope, I'm not kidding. We were so busy with the wedding we didn't do our shopping until 2 days before Christmas. We hit up one store and literally did all of our shopping there until we were finished. I also had my wedding manicure removed and got my nails decked out for the holiday. These beauties will be with me into January...
note the entrance of my wedding band! (First manicure after the wedding)
We spent the rest of the 23rd wrapping presents and I got my baking skills on. I made peanut butter cookies and for the first time made smore bars. The smore bars were a big hit and they were extremely easy to make. All you need is some fudge brownie mix, a bag of marsh mellows  and a box of graham crackers. They took about 40 minutes to bake. This is how the turned out...
On Christmas Eve we spent the day relaxing and in the evening headed to my in laws house. I proudly wore this shirt the whole evening...
On Christmas I was able to Skype (thank goodness for technology) with my mom and we were able to watch each other open our gifts.
 
Since my mom and I didn't get to physically be in the same place for Christmas, I took on the role of making Christmas dinner. I made an entire ham by myself along with mashed potatoes and homemade gravy. I also made baked macaroni and cheese. I was going to make another dessert but decided we had too many sweets in the house already. Next week I'll make a peanut butter pie.
We had a pretty low key Christmas but next year we will do it up big! I should mention I got some amazing Christmas village pieces to start off my new Christmas project for next year!

Tuesday, July 7, 2015

Cookies and Treats

What goes along with Christmas? Cookies and treats! Growing up my mom, my grandma and I would bake tons of Christmas cookies and treats together. As I got older and we got busier we would bake less and less but every year we still made a few cookies. This past year when I went home for the holiday we found the time to make Chocolate Peanut Butter Balls.
 

When it comes to Christmas baking everyone has their favorites and their staples. These are some of my personal favorites...

Pinwheel cookies
https://www.pinterest.com/pin/420453315184883876/

Peanut Butter Fudge
https://www.pinterest.com/pin/195273333819302016/

Stars & Trees
Ginger cookies
 
https://www.pinterest.com/pin/48343395976050390/
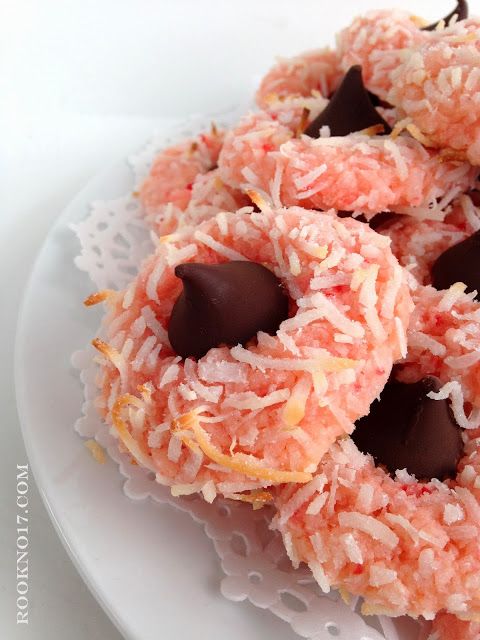
Coconut Kisses
https://www.pinterest.com/pin/255579347577608447/
Rock Candy
https://www.pinterest.com/pin/313422455289175292/https://www.pinterest.com/pin/313422455289175292/
 
Red Velvet Crinkle Cookies
https://www.pinterest.com/pin/56787645275298364/
 
Snoopy Cookies. My mom loves Snoopy so this year I'll attempt to recreate these!
https://www.pinterest.com/pin/561683384751124482/
 
What kind of cookies or treats do you like to make at Christmas time and during the holidays? These are just a few of our favorites during the season.